
Protecting Your Work: How to Lock Cells and Hide Formulas
Thành Thái
4/15/2026
1. The "Default" Trap (Why everything is locked)
Here is a Lab Secret: By default, every single cell in Excel is already marked as "Locked." However, "Locked" does nothing until you Protect the Sheet. If you protect the sheet right now, you won't be able to type anywhere. To fix this, we have to work backward.
Step 1: Unlocking the "Input Zones"
Before protecting the sheet, you must tell Excel which cells users are allowed to change (like a "Name" or "Quantity" box).
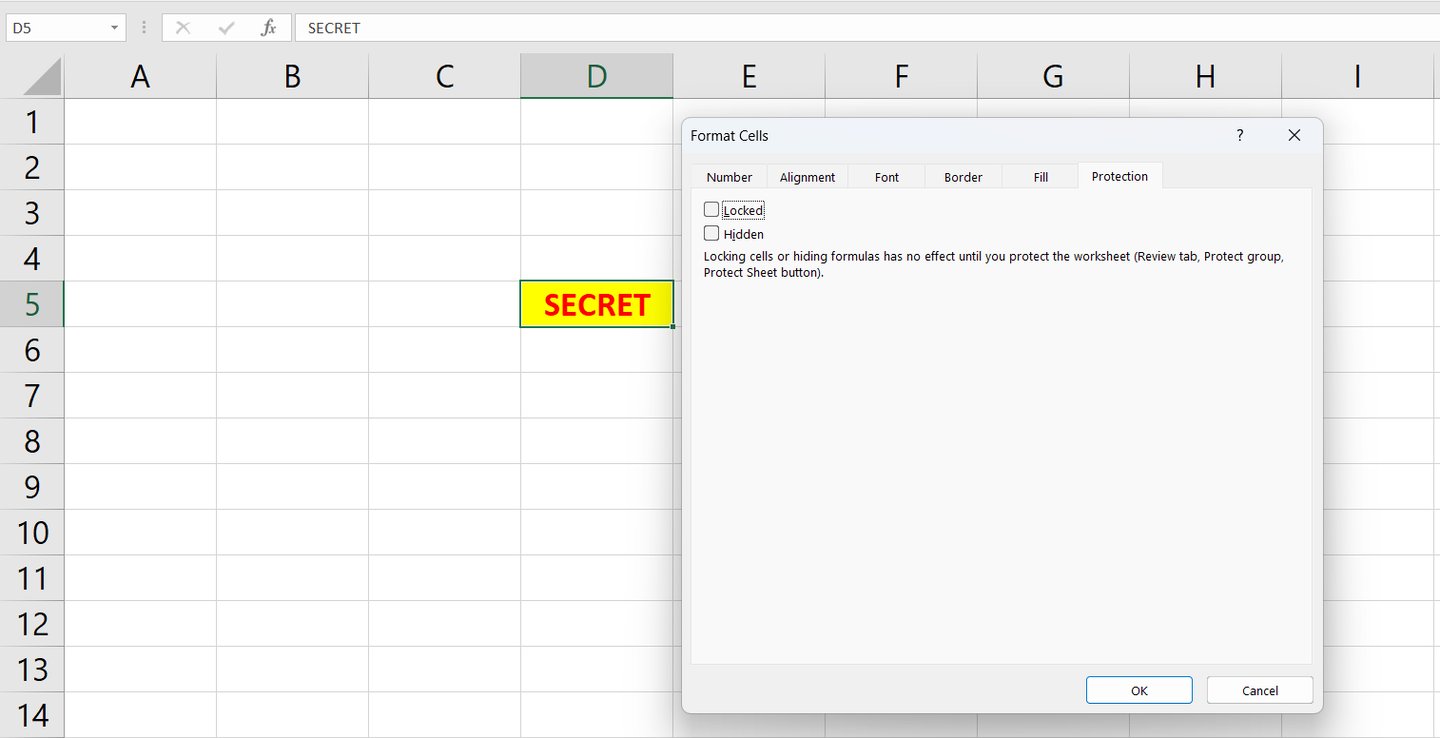
Select the cells where users should type data.
Press Ctrl + 1 (The Format Cells shortcut).
Go to the Protection tab.
Uncheck the box that says "Locked."
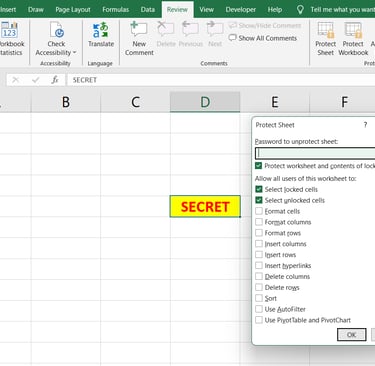
Step 3: Activating the Shield (Protect Sheet)
Now that you’ve defined the rules, it’s time to turn on the security.
Go to the Review tab > Protect Sheet.
Set a Password: (Optional, but recommended).
Permissions: Uncheck "Select locked cells" if you want to prevent users from even clicking on your formulas.
Click OK.
The Lab Result: Try clicking your formula cells. You can't. Try typing in your input boxes. You can! Your spreadsheet is now a professional "Input-Only" tool.
2. Protecting the "Skeleton" (Protect Workbook)
Protecting a Sheet stops people from changing cells. Protecting a Workbook stops them from:
Renaming your tabs.
Deleting your hidden calculation sheets.
Adding new, messy tabs to your clean file.
Go to: Review > Protect Workbook to lock the structure of your file.
Why This Matters for AdSense & Credibility
Sharing protected, clean files proves that you aren't just an "Excel User"—you are a Developer. It builds trust with your audience, making them more likely to download your templates from the Smart Sheet Lab.
Common Security Mistakes to Avoid:
Forgetting the Password: There is no "Forgot Password" button for Excel sheets. Keep a copy in a safe place!
Locking Everything: If users can't click anywhere, they will get frustrated. Always highlight your "Input Zones" in a different color (like light yellow) so users know where they can type.
Final Lab Report
Security isn't about being "secretive"; it's about User Experience. A protected sheet is easier to use because the user only sees what they need to see.

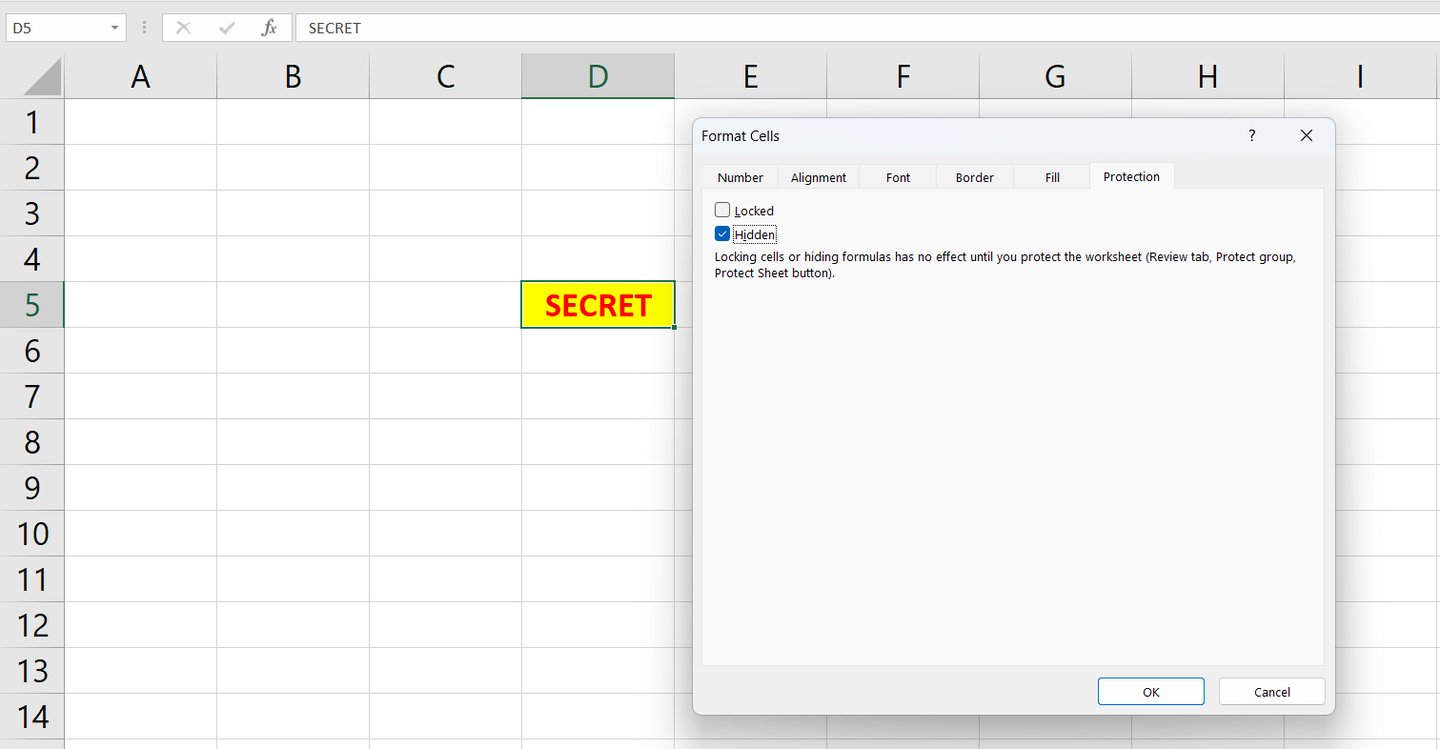
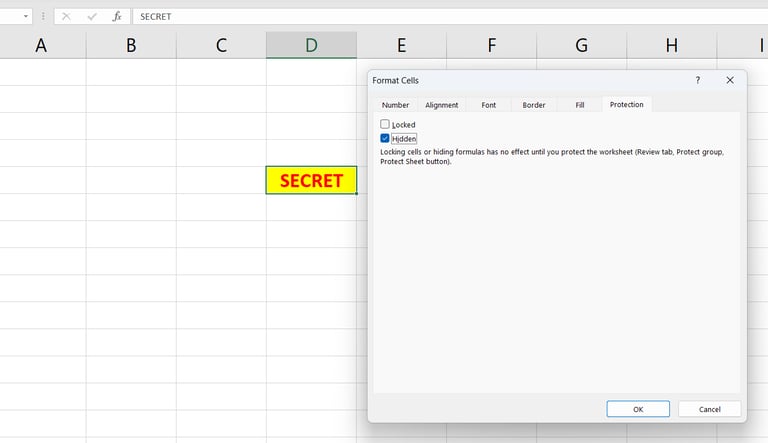
Step 2: Hiding Your "Secret Sauce" Formulas
Sometimes, you want people to see the result of a formula, but you don't want them to see the logic (the math behind it) in the formula bar.
Select your formula cells.
Press Ctrl + 1 > Protection tab.
Check the box that says "Hidden." Note: This doesn't make the cell disappear; it only hides the text in the formula bar once the sheet is protected.
Product
© 2026. All rights reserved.